Recap
The North America Nebula is a bright target, relatively speaking, and thus very beginner-friendly target in the constellation of cygnus. It’s one of the first deep sky objects I tried to photograph, way back when I was just using my old DLSR (a Canon 1000D) on a photo tripod with a 18-55mm kit lens. I just aimed at it, shot it for roughly an hour while tracking it with my hand and got … nothing.
The main issue was, that I couldn’t stay on target long enough to get usable data. So I needed a camera mount which will track the night sky for me. I did choose the StarAdventurer GTi because it’s portable and quite affordable. With it, I was able to get a pretty good-looking picture for the time being. I covered it back in my last post about NGC 7000.
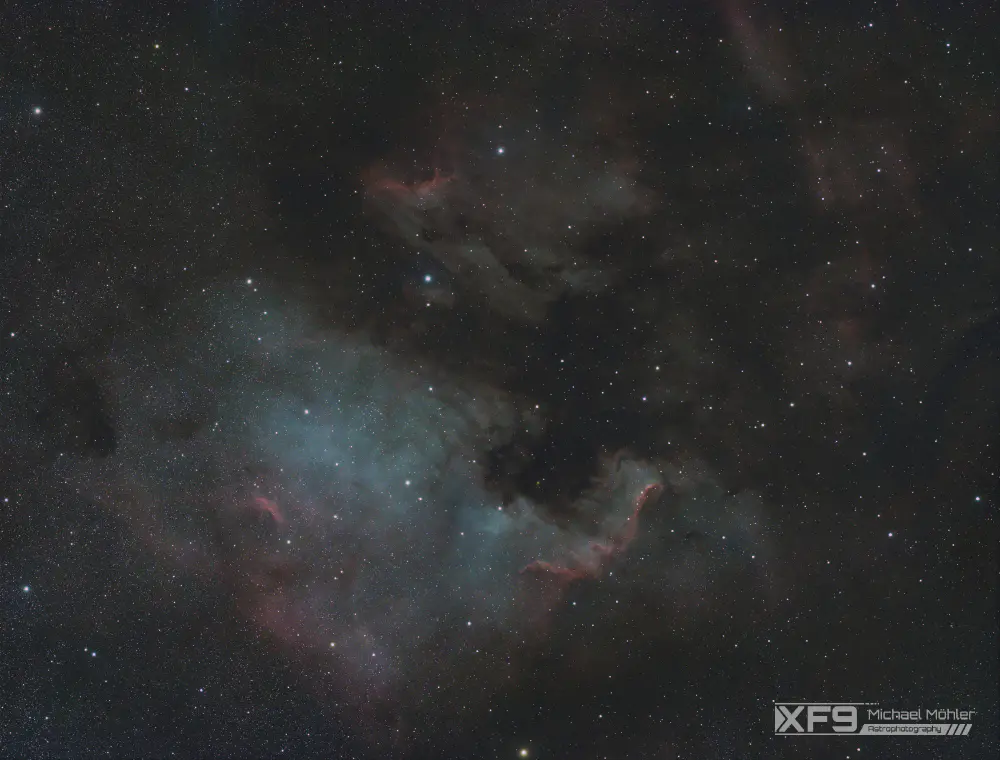
A few months later I got my RedCat 51 and I had to try it on this target. This marks my best image to date of this target:
Planing
So, it’s nebula season again and time for me to shoot the North America Nebula once again to test what I’ve learned since last time. I could just point my telescope at the sky and start imaging, but I want this image to be great. So there is a fair bit of planing involved on what I want to include and what techniques to use.
Framing
The “natural” orientation is the one from the image above. I put it in quotes as there is no up or down nor left or right in space. But it’s the orientation most photographers use. But I want to make it my own. So I fired up Stellarium and started looking around to see what I want to include. In the end I did came up with a rough idea:

There is a dark nebula I wanted to include to the top left of the frame. Also, there seems to be quite some nebulosity south to the pelican which looks interesting and I wanted to include. I was a bit worried as this framing will create a 90° angle for NGC 7000 which will form parallel lines with the frames borders. I feared, that this will create a “technical” look and I wanted something “organic” looking. But there was no option to rotate the camera in any way without loosing my points of interest.
Gear
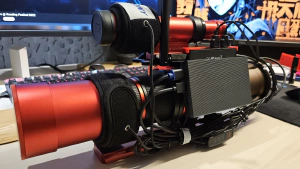
Gear wise I don’t have much to choose from. I went for the usual, including my trusty RedCat 51, an Omegon 571C dedicated astro camera, mounted on my Star Adventurer GTi. So the gear is nearly identical as last year, but the camera is new. Last year I used my old DLSR which is insensitive for the red glowing hydrogen, which there is plenty in this nebula. Hence, the teal color in last year’s image.
This year I’m using a dedicated astro camera which is very sensitive to the red hydrogen, which will result in a reddish image like in the one from Stellarium above. To be honest I’m not a fan of this look, so I did some research on what to do about it. Well there wasn’t that much research involved as I already knew the answer: I need a duo-narrowband filter.
Narrowband filter are traditionally used with monochrome cameras to image certain emission lines: hydrogen (Hα), oxygen (OIII) and sulfur (SII). While pure narrowband filter should only be used with monochrome cameras, duo-narrowband filters can be used with OSC (one shot color) cameras - such as mine. So I went out and bought a SV220 - a duo-narrowband filter from SV Bony. This allows me to capture hydrogen in the red channel of my image and oxygen in the blue and green one. During postprocessing I will be able to separate these channels and boost the oxygen to get the blue back.
One drawback of these duo-narrowband filter are star colors. Stars emit light all over the spectrum and if we only image parts of this spectrum they will look kinda strange. I covered this in my last post about imaging stars. So I will need to shoot some RGB stars, without the filter.
Imaging
After planing everything I needed to wait for some time for the sky to clear up, and I’m good to go. Imaging went pretty uneventful. I captured data over the course of three nights for a total of 8,5 hours of total integration time (summer nights are short) and around 20 minutes broadband data for rgb stars.
Processing
Postprocessing required some additional steps, as this is duo-narrowband data. I started with my usual workflow:
- Background extraction (GraXpert) for a nice and even background
- Color calibration
- Deconvolution (BlurXTerminator) to enhance details and reduce the star size
- Noise reduction (Deep SNR) to remove unwanted “graininess”
- Star removal (StarXTerminator) to split the nebula from the stars
- GHS to bring out the details
Usually this is the time to do a star recomposition, to bring the stars back in and do some final touches. But, as I mentioned earlier, I don’t like that pure red look of the hydrogen. So now’s the time to push the oxygen, so it can overpower the hydrogen. There is this awesome plugin for PixInsight: NarrowbandNormalization by Mike Cranfield. This script allows me to easily boost the oxygen.
On the flip side, this creates a HOO Palette in which the hydrogen is getting yellow. It tried to correct that witch masks and curves, but it didn’t work out the way I wanted. So I tried something new and downloaded the trial version of Affinity Photo. This is a software for photo editing like Photoshop, just without a subscription. With that I was able to adjust the colors to my liking and ended up with this image:
Final image
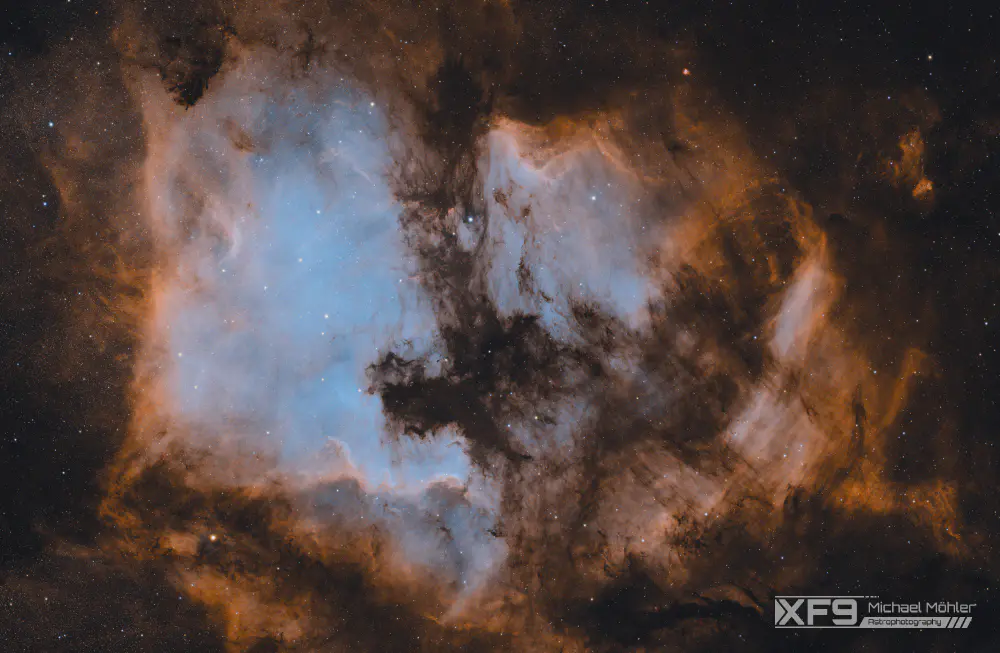
This is NGC 7000 and it’s surrounding area. We’ll look at the details in a moment, I just want you to appreciate the view for a moment :)
[ .. ]
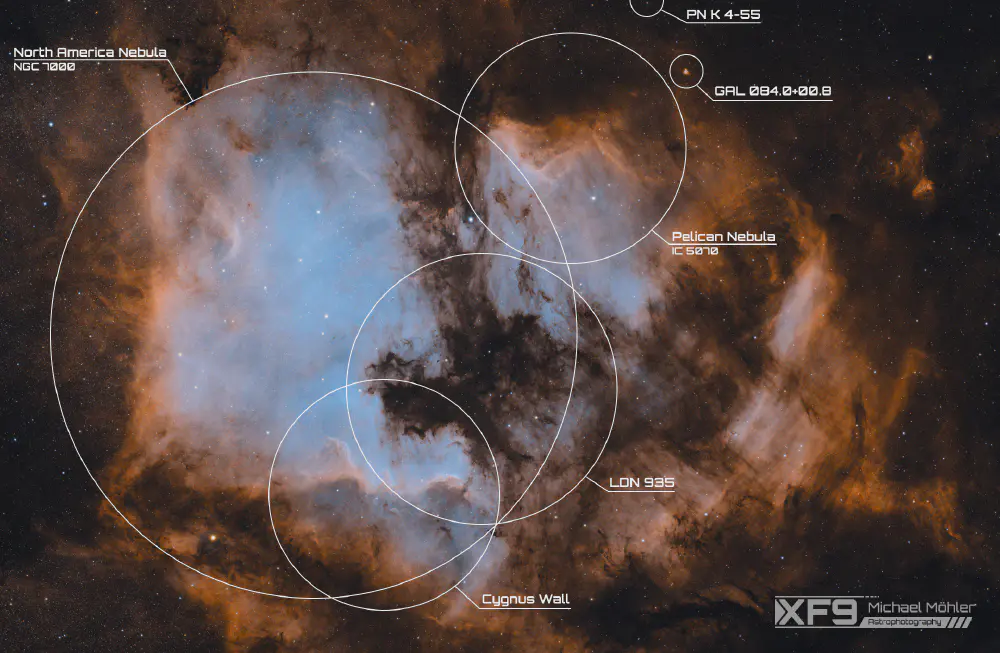
Now then, lets have a look at what I’ve captured. To help you I’ve annotated the image:
The North America Nebula / NGC 7000 and Cygnus Wall
I’m always talking about the North America Nebula, but it’s just the left part of the image. To the left and bottom of NGC 7000 there are hydrogen clouds, and it’s center is full of oxygen. In the bottom hydrogen cloud there is also the rather famous Cygnus Wall.
The North America nebula got its name from its rather distinguish shape. If you tilt your head a bit to the left you may be able to see the shape of the north american continent with the black nebula filling in as the gulf of mexico.
Pelican Nebula / IC 5070
The pelican is in the upper part of the right side. It also got its name from its shape, but I have difficulties seeing it in this image ..
LDN 935
LDN 935 is the band separating the North America Nebula from the pelican. It’s a dark nebula, so it won’t emit light by itself like the other two emission nebulae and hence appears near black. While it appears that this nebula is dividing the other two nebulae it’s actually in from of both and the other two are in fact a single structure.
There are also some other dark nebula in this image, see if you can spot them :)
GAL 084.0+00.8
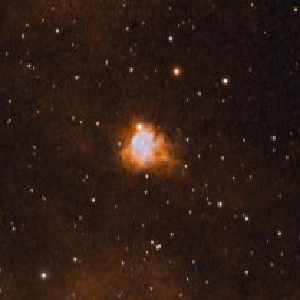
This one turned up unexpectedly. I noticed a red structure while framing in stellarium but didn’t think much of it. It’s a hydrogen region close to the pelican and there aren’t that many pictures of it around. Sadly I don’t have the required focal length to ge a closer look at it. But once I’ve got a bigger scope I’ll try to image it. Maybe I could use the big one in my local astronomy club ..
PN K 4-55

This one is even smaller and wasn’t expected at all. This is a planetary nebula right at the edge of the frame. I never thought I would be able to capture one, at least not with my wide field setup. Julien over at mastodon notified me about that one. I would have never found it by myself. Cheers mate!
Next year
With this year iteration concluded, what is up for next year? Well, for starters I discovered that there is much more nebulosity around it than I anticipated. I did cut it unknowingly and for next year I want to try to capture more of it. This would require a larger sensor (which is quite expensive) or a mosaic (which will require more time). So I’m hoping for more clear nights next year ;)
Processing wise I’m quite happy with this year’s result. It could benefit from more integration time and a bit of a change in color. While the hydrogen has an orange color I would prefer it to be more in the reds and the hydrogen in the deeper blues. So I guess I need to learn how to properly process narrowband data.
For now let’s close with the words of Cuiv the lazy geek: don’t forget to look up at the stars and see you next time :)
